
3. Router Jig Basic Instructions.
Tutorial 3 of 3
Note - Doorprofi bags are no longer available.
Clamps
The Lockcarpentry Router Jig 2.0 has T-slots in the side rail to hold track clamps, which is a great feature. Irwin quick grip clamps or similar are also needed and they freely clamp onto the side rail, depending on the set up. E.g. wide door jambs require longer clamps.

How To Use The Jig
This video shows how to set the jig for installing a latch or lock.
Audio only video below.
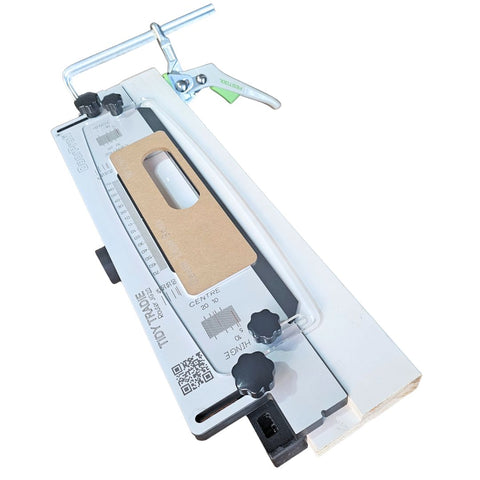
For butt hinges and lock faceplates, the jig needs to be clamped on the door with the platform edge flush with the face of the door. Watch the video tutorials for a better understanding.
- The hinge markings are only for butt hinges, not concealed hinges.
- The centre markings are for latches, locks, and blank templates up to 28mm wide.
- The internal markings top and bottom help to show the door thickness when the jigs base edge is flush with the face of the door.
- The internal side markings help for repositioning the jig. Record the number that is on your pencil mark centre line. For example the top position could be +55 and the bottom could be -38.
- The top side row markings help to position the base of the router when using blank templates freehandedly.
For a 35mm door, the base plate centre line mark goes on 17.5 half the thickness of the door. You can sight the centre of the latch with the template line, then do a small test cut. Once it's in the correct position, record the centre measurement on the internal side markings. It could be 44.5 or 45 depending on the latch size.
Before committing to the first cut-out, always do a very light plunge cut to see if you’re on your pencil marks and that it's centred on the door. You should always do a test cut first if you want perfection!
Routers have play in them so try cutting with the plunge locked and if the fit is too tight, unlock the plunge to cut a little bigger.
It all takes practice getting to know your router and jig but once you get the hang of it, it's brilliant.
Sometimes the jig doesn't need to be flush with the door face and you just sight 2mm off your pencil marks. This is the case for large cavities like pivots, flush bolts etc. You can site of a pencil mark when using the blank templates as well.
If you see our videos online and would like more of an explanation of what is happening, feel free to email Tony@lockcarpentry.com.au
I hope that helps to get you started. It is an advanced router jig and you can do so much with it, not like those expensive yet basic no offset jigs.
https://lockcarpentryshop.au/pages/setting-up-your-router
https://lockcarpentryshop.au/pages/choosing-cutters-for-your-router